Often, customers prefer to use self-service appointment booking services instead of calling or emailing your business. After including this feature on your website, however, you may struggle with consistent no-shows. When your reservations aren’t being fulfilled, this can contribute to fewer sales and wasted company time.
Fortunately, you can easily add a WooCommerce checkout form to your reservations page. With the Salon Booking System WooCommerce Integration, you can customize payment methods and start tracking appointments as WooCommerce orders.
In this post, we’ll discuss why you should consider creating a WooCommerce checkout page for your online reservations. Then, we’ll show you how to do this in three simple steps. Let’s get started!
The Benefits of Using a WooCommerce Checkout Page for Reservations
Before customers visit an in-person business, they usually like to book appointments online. Therefore, when you’re managing a salon, restaurant, or spa, it’s important to add a booking feature to your website:
An online booking system enables customers to make new appointments on their own time. It can automate the scheduling process for your business, decreasing the number of phone calls and emails you have to manage.
However, certain customers may not show up for their appointments. When this happens, it can be extremely inconvenient for your business. No-shows inevitably decrease your revenue and waste your employees’ valuable time.
To prevent this problem, you can add a WooCommerce checkout page to your reservation form. By having customers pay for your services during the booking process, they are more likely to show up to their appointments:
Integrating WooCommerce into your business website can help you manage your reservations better. It will clone each booking as a WooCommerce order and transform listed services into WooCommerce products. This setup also lets you track your business analytics and find ways to improve your site.
How to Add a WooCommerce Checkout Page for Reservations (In 3 Steps)
Now that you know the benefits of using a WooCommerce checkout page, it’s time to create one for your website. Follow these steps and help your customers easily pay for their appointments online!
Step 1: Install Salon Booking System
To start accepting appointment bookings on your website, we recommend installing our Salon Booking System plugin. With this tool, you can create scheduling rules for your business and easily manage your online reservations:
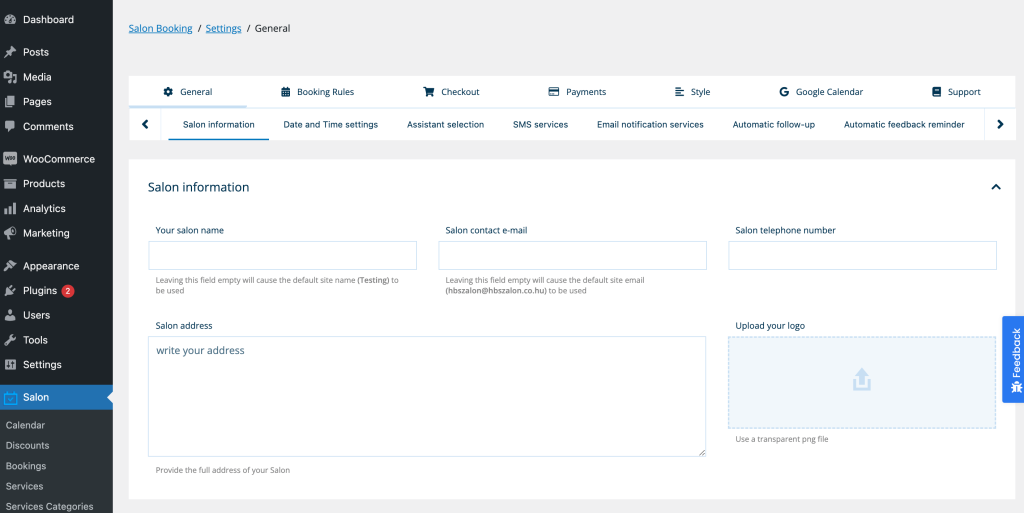
Once you install and activate the plugin, it’s time to add some information about your business. Firstly, navigate to Salon > Settings > General. Here, you can fill out your company’s name, address, phone number, email address, and logo:
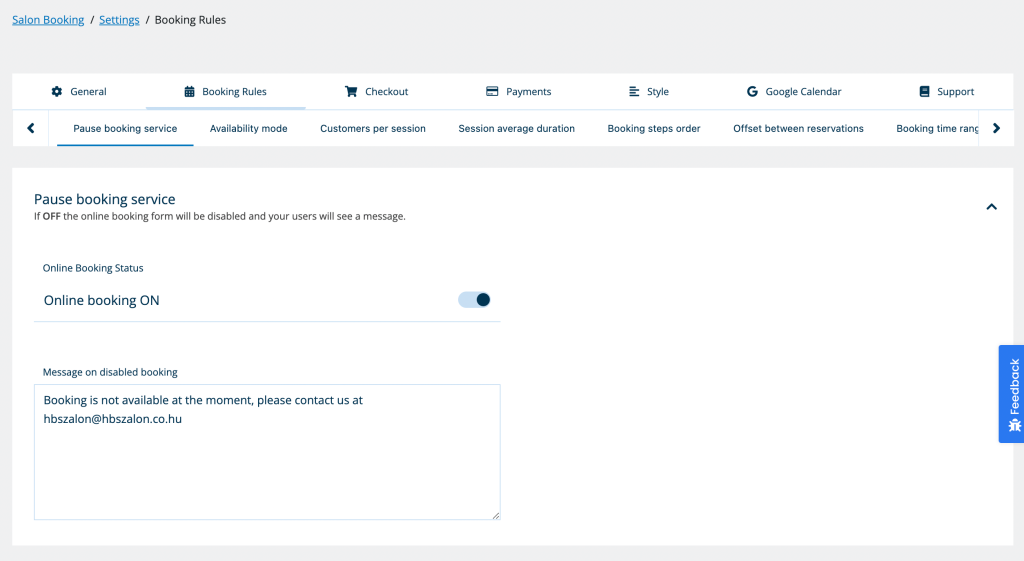
Then, you can set some rules for online bookings. To do this, find the Booking Rules tab. Be sure to turn on the Online Booking Status and create a message for when your bookings are unavailable:
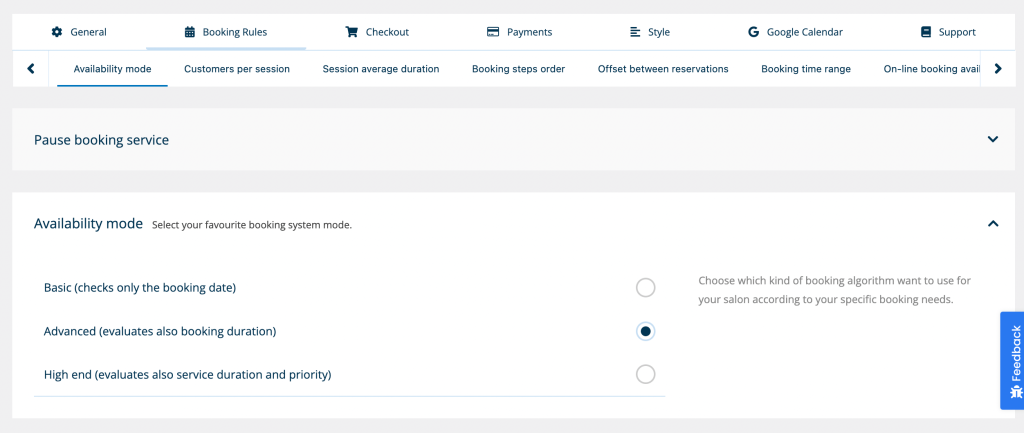
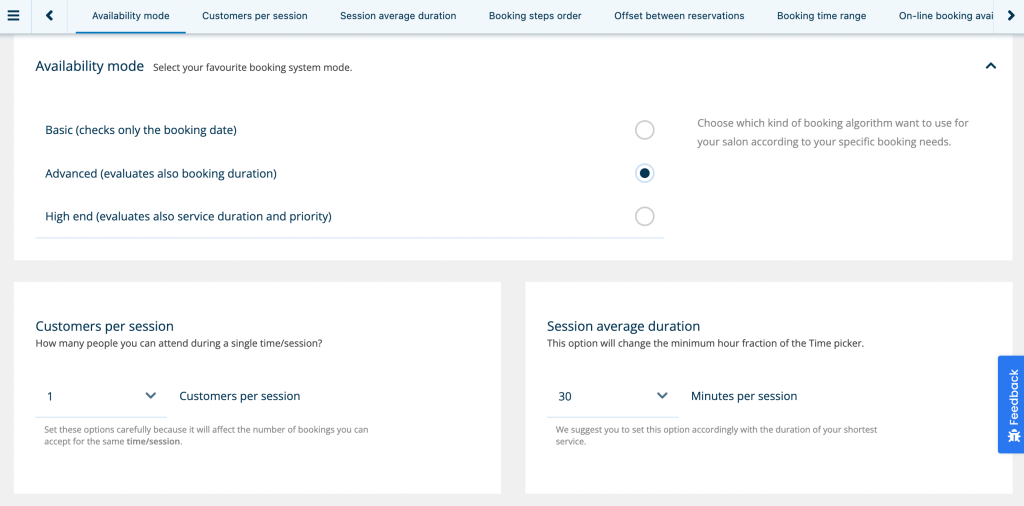
In the Availability mode section, you can customize your booking algorithm. For most businesses, the Advanced setting is the best option since it will automatically calculate the total duration of all the services in one booking:
Be sure to also adjust the number of customers allowed in a single session. You can also set an average appointment duration:
After saving these changes, you can continue to the next step!
Step 2: Download the WooCommerce Checkout Add-on
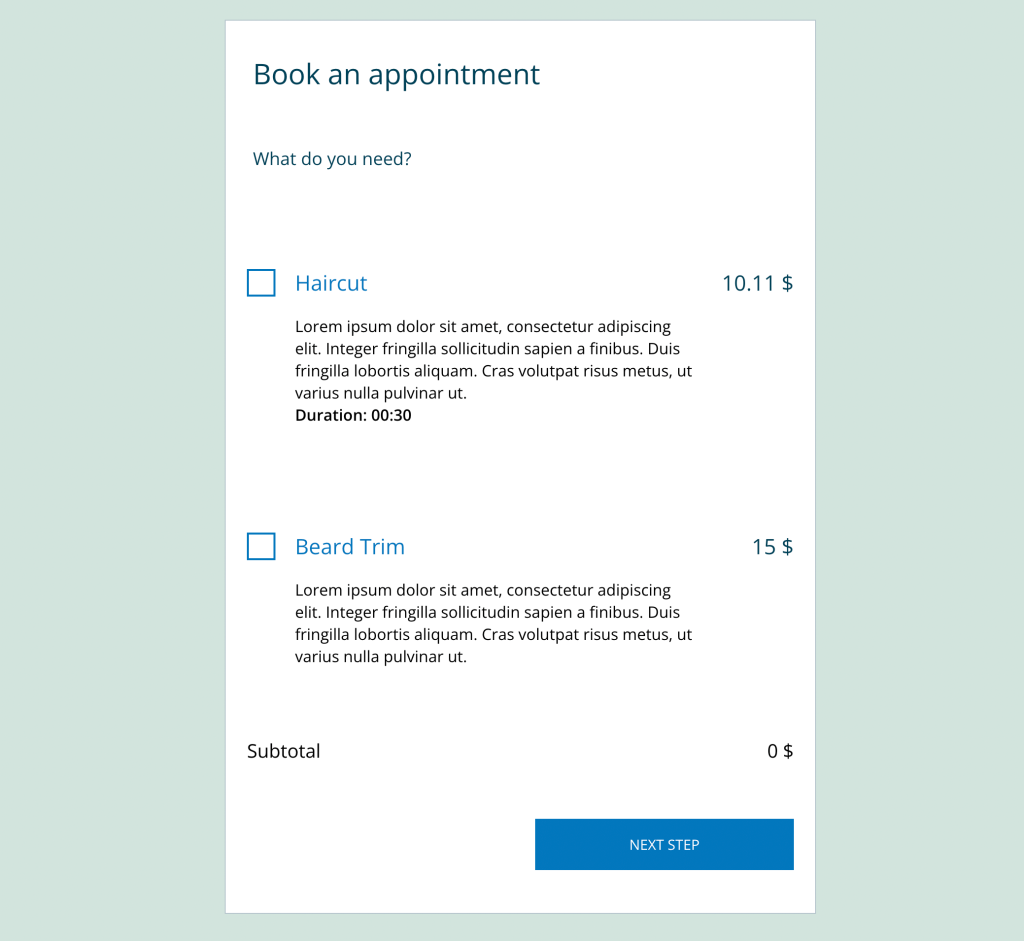
Once Salon Booking System is installed, our plugin will automatically create all the necessary pages for the online booking process. For example, visitors can reserve appointments in your business on the Booking page.
Although our plugin supports online payments, you may want additional customization options. To add more features to the checkout page, you can install our WooCommerce Checkout Add-on. This extension will redirect customers to a WooCommerce checkout page after the Salon Booking System reservation process.
First, activate this add-on and paste the license key from your purchase. Then, head to Salon > Settings > Checkout. Scroll down to the Use Woocommerce Checkout field and enable it:
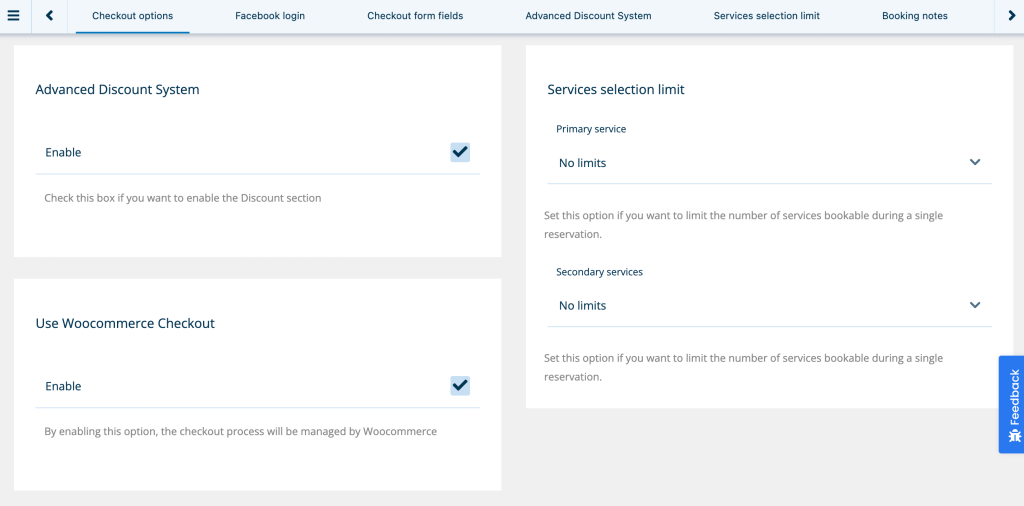
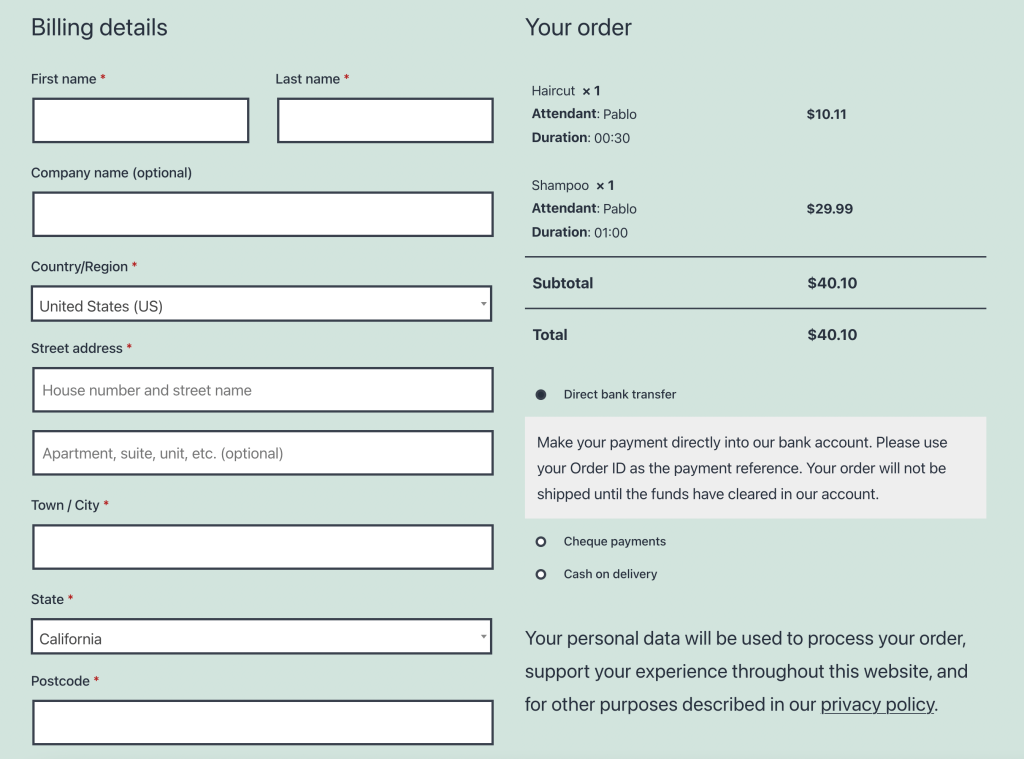
After this, save your changes. This will automatically add WooCommerce checkout options to the end of the booking page. Customers can use this feature to fill out their billing details, see the amount due, and place new orders.
Step 3: Edit Your Checkout Page
You should now have a fully functional WooCommerce checkout page for your website. However, you may want to customize the booking process even further to make it easier for customers to book appointments.
After installing Salon Booking System, it will add some default services to your website. To customize these for your business, click on the Services tab:
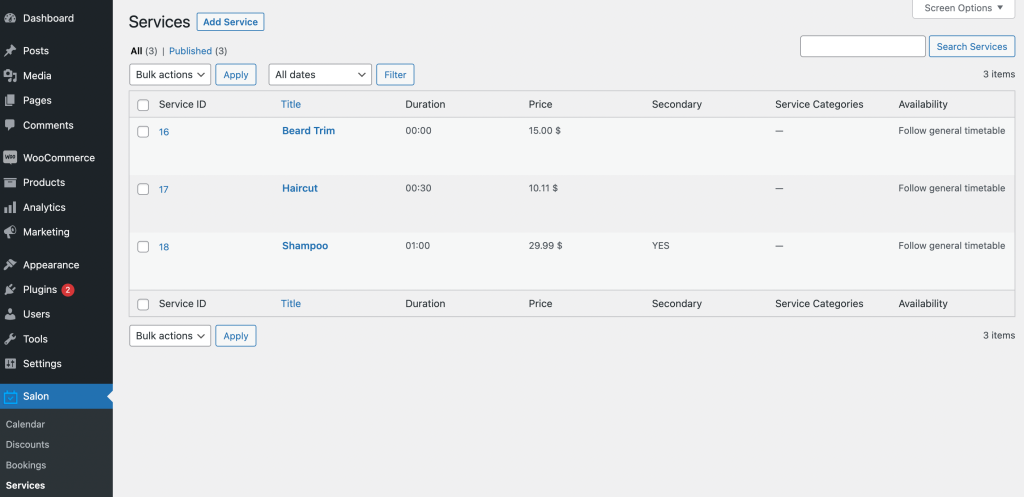
You can edit any of these options or select Add Service to create a new one. Next, enter a name for the service, as well as its price and duration:
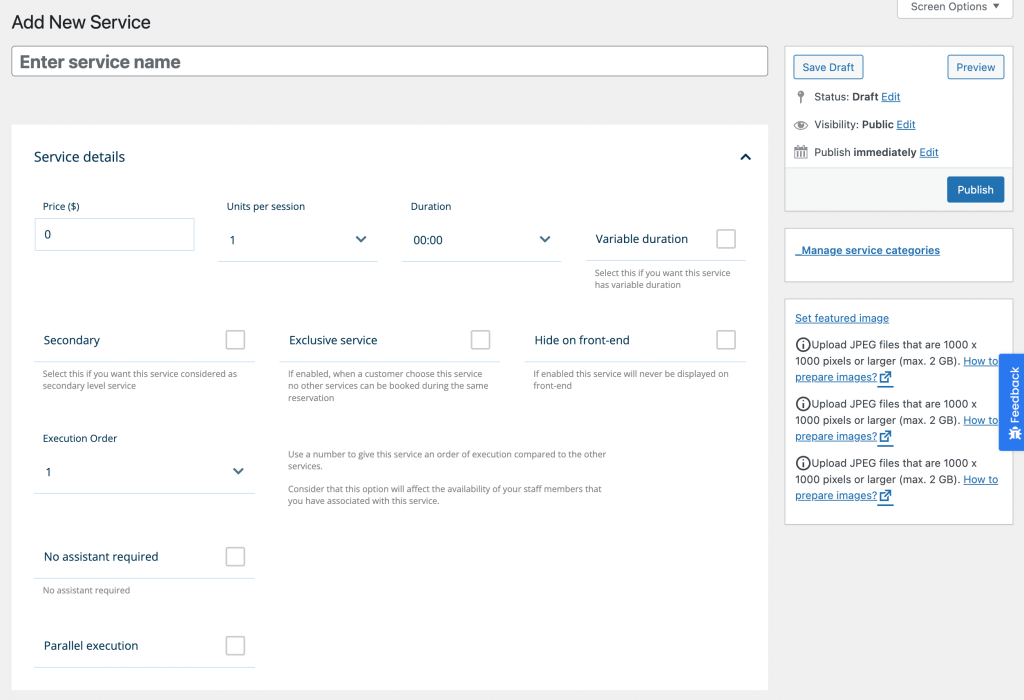
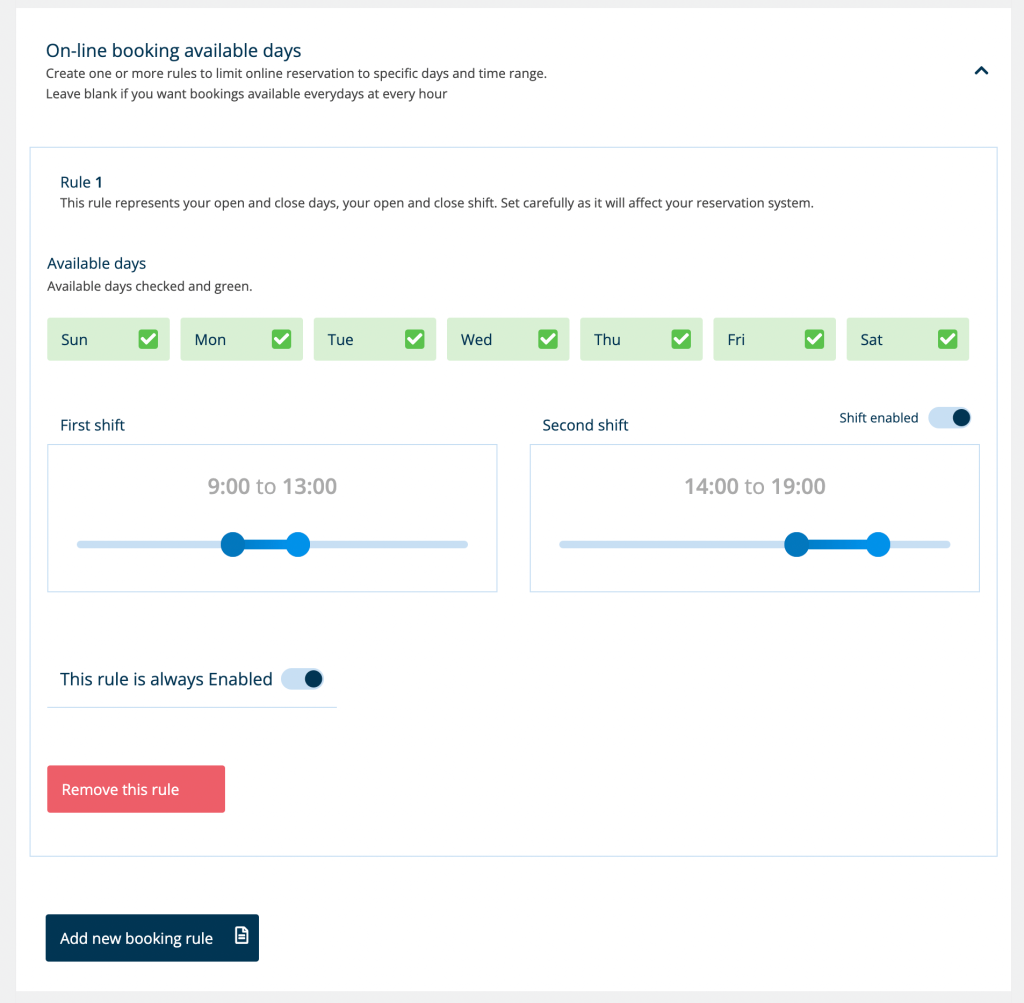
If needed, you can add a new booking rule. It will limit online reservations for that service to a specific day or time range:
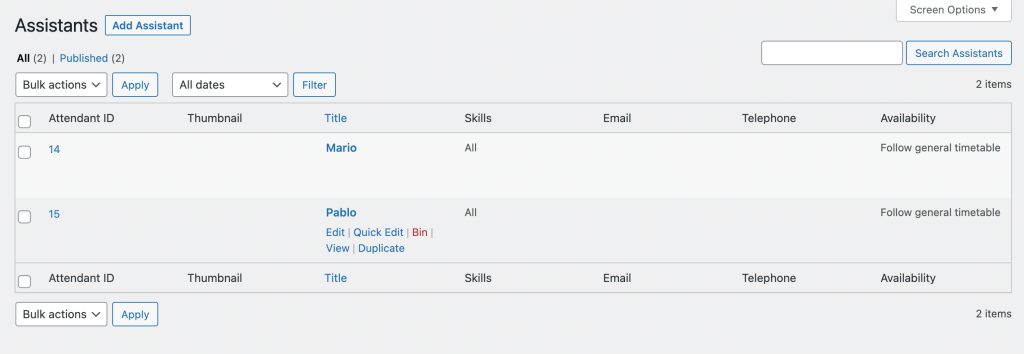
On the Assistants page, you can enable customers to book reservations with a specific team member. Here, you’re also able to add new employees and specify their availability and skill sets:
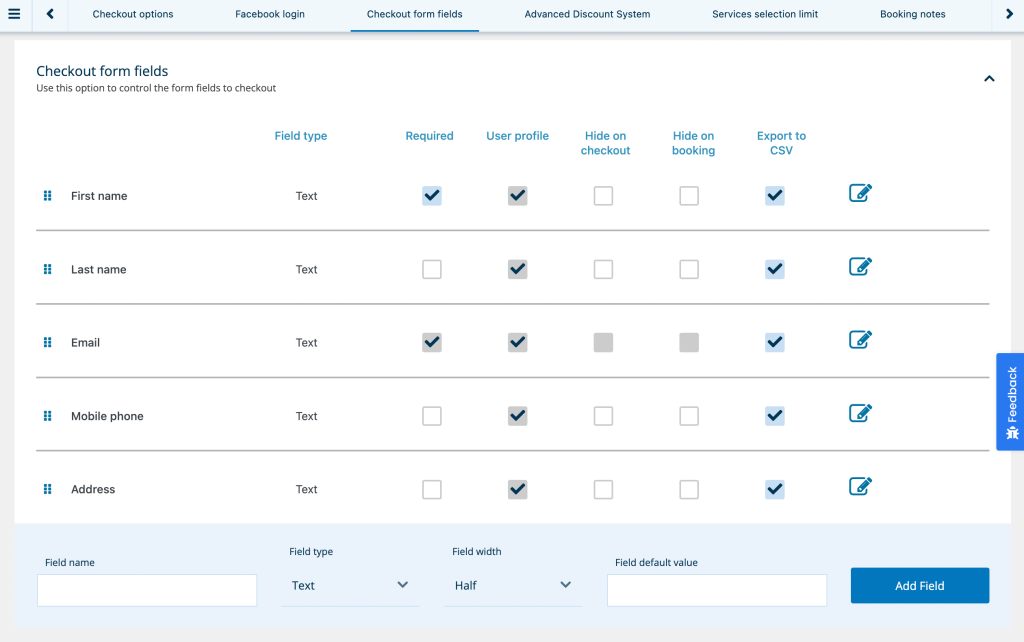
Then, go to Salon > Settings > Checkout > Checkout form fields. In this section, you can customize which fields appear in your booking form:
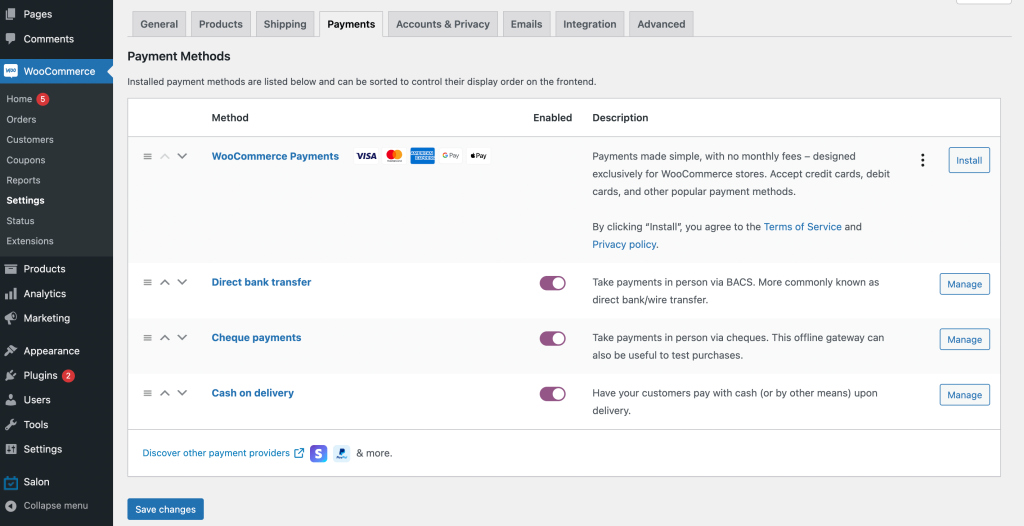
Finally, your WooCommerce checkout page may not display the correct payment methods. To change this, navigate to WooCommerce > Settings > Payments. Here, you can enable or disable certain payment methods:
You might also install the WooCommerce Checkout Field Editor add-on. It will enable you to edit any default fields on the checkout page!
Conclusion
A WooCommerce checkout page can improve your website and increase your business revenue. By making it easier to purchase your services, you can encourage visitors to fulfill their appointments.
To review, here’s how you can add a WooCommerce checkout page for reservations:
- Install Salon Booking System.
- Download the WooCommerce Checkout Add-on.
- Edit your checkout page.
Do you have any questions about customizing your online reservations with a WooCommerce checkout page? Ask us in the comments section below!